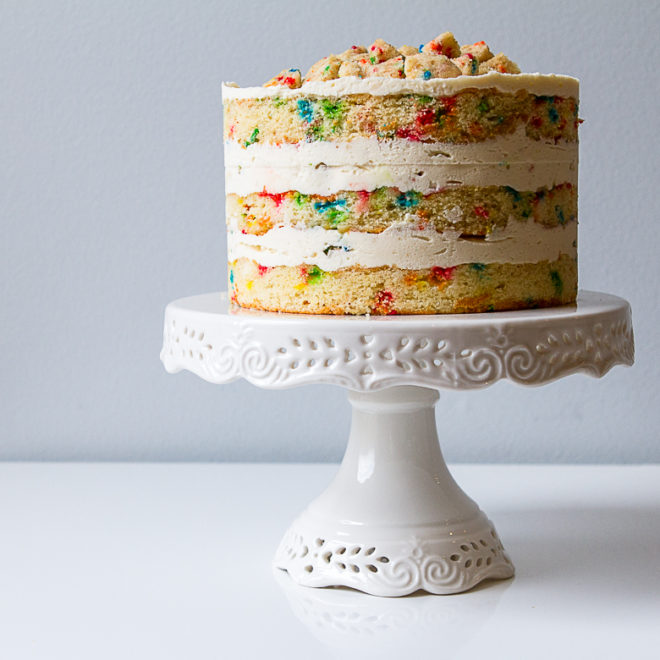
It’s my birthday week! I had a lovely birthday complete with a deep tissue massage, two very nearly 80 degree days, TONS of new cookbooks from family and old friends, and dinner at my favorite restaurant with new friends. I always make it a point to take a vacation day from work on my b-day. For my birthday this year I opted to tackle a recipe I’ve been eyeing for a while: Milk Bar’s Birthday Cake. Let me tell you, the joke was on me because this cake was WORK!

HBD2ME!
I’m through and through a true blue vanilla girl. Not in the sense of being boring, soft spoken and demure… um no. What I mean is I will always choose the musky, sultry, deep flavor of the vanilla bean over the cocoa bean. This cake is a true ode to the vanilla-lover. Vive le Vanille!
 When it comes to cake assembly and decorating, I definitely feel a lack of skill worked in my favor. All the on-line images I found of the cake looked a little sloppy and this sort of non-decorating is the decorating I can handle. I wanted to give myself plenty of time to make this cake. The other blogger’s posts I read about making this cake leaned towards it being stressful and overwhelming. Could you tackle and eat this cake all in one day? Nope. (You totally thought I was going to say “yep” there, didn’t you?) Well, you could make and assemble the cake in one whole day, sure. But you have to remember to set aside the overnight freezing time of 12 hours to allow it to “set”. Finally, home baker, you must allow for another 3 hours to thaw before eating.
 This Birthday Cake can be broken down into four parts and this is how I paced mine out to minimize stress and frustration:
- Cake crumbs – Day 1
- Actual cake baking – Day 2
- Frosting – Day 3
- Assembly (including milk wash) – Day 3
You could leave off the cake crumbs but honestly they made the cake extra special with their unexpected crunchy, sweet and salty bite. Like I said, I read a bunch of other blogger’s harrowing accounts before attempting this recipe. LivForCake suggested making 1 1/2 times the amount of frosting and she was not wrong. We all know running out of frosting for your 3-days-in-the-making birthday cake is THE WORST.
Ok, so we’ve established the Birthday Cake is time-consuming and slightly intimidating. Now onward to the next hurdle; some weird ingredients and tools not found in my kitchen requiring a special trip to the grocery store or amazon. I did find clear vanilla extract and grapeseed oil at my local Publix without problem. I did need amazon for glucose, a 10×15″ jellyroll pan, a 6′ cake ring, and acetate strips for holding it all together. (I did see another blogger use 6″ round cake pans and parchment in place of acetate for assembly and she seemed to do ok, if you aren’t that big on a crisp finish.)

cake ingredients
Gather your ingredients and measure them out prior to beginning the baking process. Let’s make this as easy as possible on ourselves! Let me also write, this was my FIRST attempt at this cake and I am quite chuffed (my sweet nanny’s word) at how well it turned out. Here are some tips to read before embarking on this journey.
- Cake Crumbs:
Make the cake crumbs first. I made my crumbs the night before then put them in an airtight container until the following day. I would suggest making most of the crumbs smaller rather than larger, saving the smaller ones for in-between the layers and the larger pieces for final garnish on top of the cake. If the crumbs don’t “come together” in your stand mixer’s bowl, don’t panic. Instead, use your hands to roll out little crumb balls. If you find they are too large you can always chop them up after baking and cooling. They are just crumbs, it’s all going to be ok (or so I told myself).

mmm crumbly
2. Actual Cake Baking:
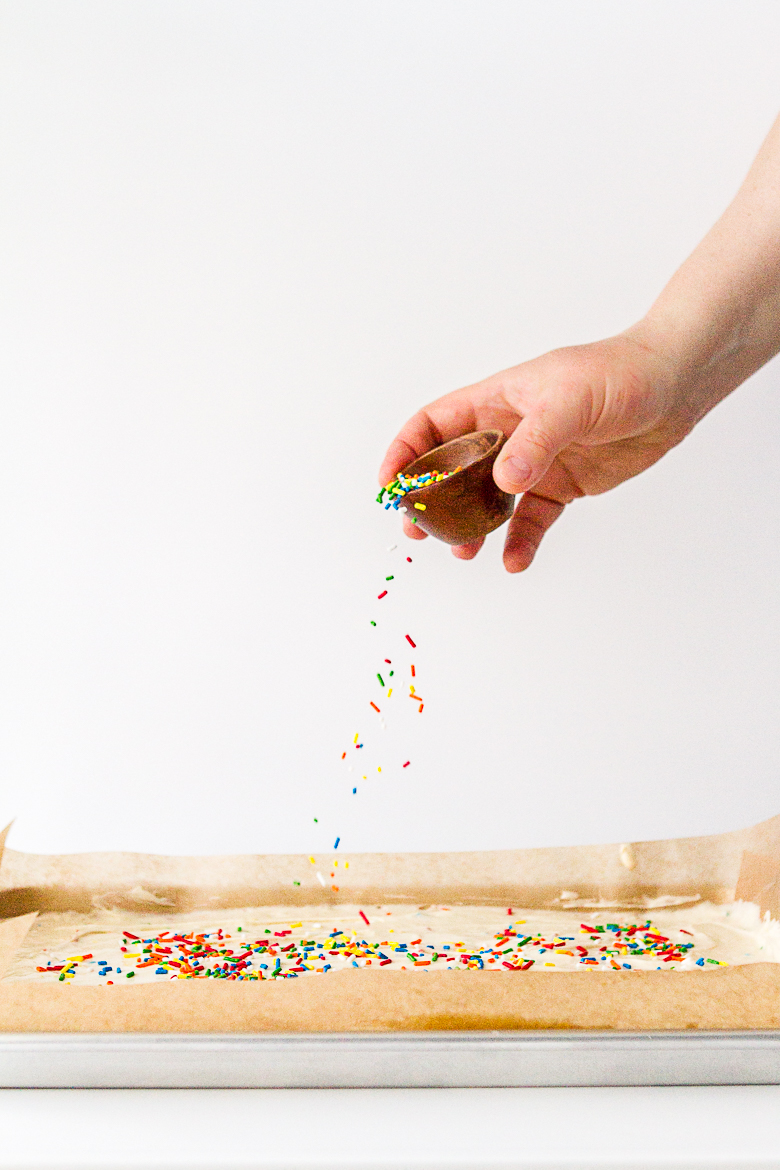
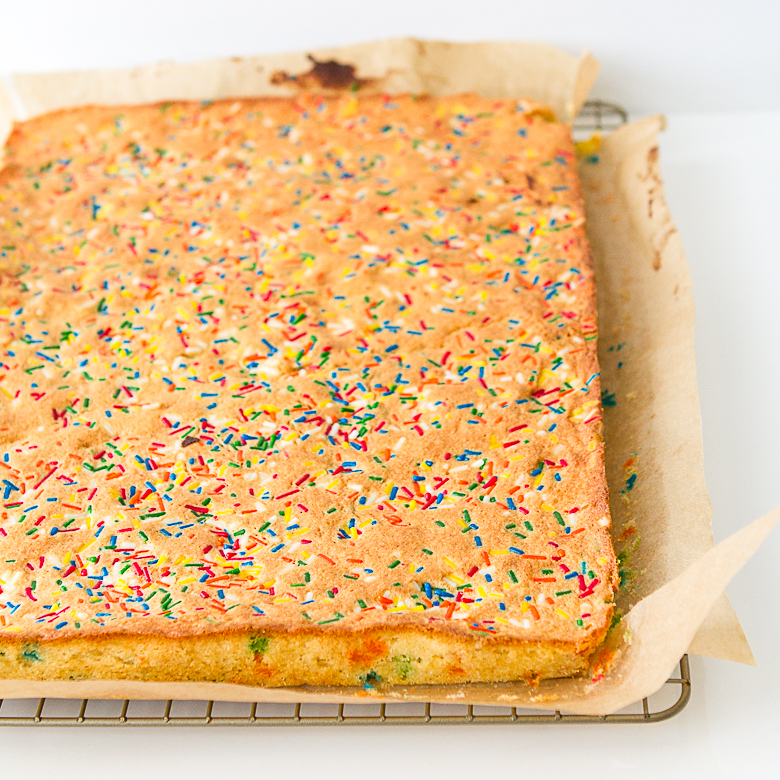
Follow the below instructions on making the cake and be sure to use that special 10×15″ sized jellyroll pan. Give the pan a few good flat smacks on the counter after you’ve poured in the batter to get rid of air bubbles and even out the batter. Remember, half the sprinkles get mixed into the batter and the other half get sprinkled on top. It gives you a nice melty sprinkle vs non-melty sprinkle contrast.
Once the cake is done, it will be slightly browned on top without any wobble.
sharp sprinkles vs…
Let the cake cool on a wire rack completely, and wrap in plastic wrap and place into the fridge until you are ready for assembly (or up to 5 days).
3. Frosting:
I didn’t have much difficulty with the frosting other than getting the glucose and corn syrup off of the measuring spoon. If you’ve ever used a glue gun, well, let’s just say glucose has part of the word “glue” in it and I had strands of glucose running from one end of my kitchen to the other, like old spiderwebs. I used one sixth of a lemon wedge’s juice in place of citric acid (cut lemon into six slices, squeeze just one slice’s juice). I think the frosting was my most favorite part of this cake. I couldn’t stop eating it. Could. Not. The below frosting recipe has been increased by 50%.
4. Assembly and milk wash:
Flip the cake out of the pan so the bottom of the cake is facing you. Using the 6″ cake ring, cut out two full circles from opposite corners of the sheet cake. The third circle you will have to piece together with two halves.
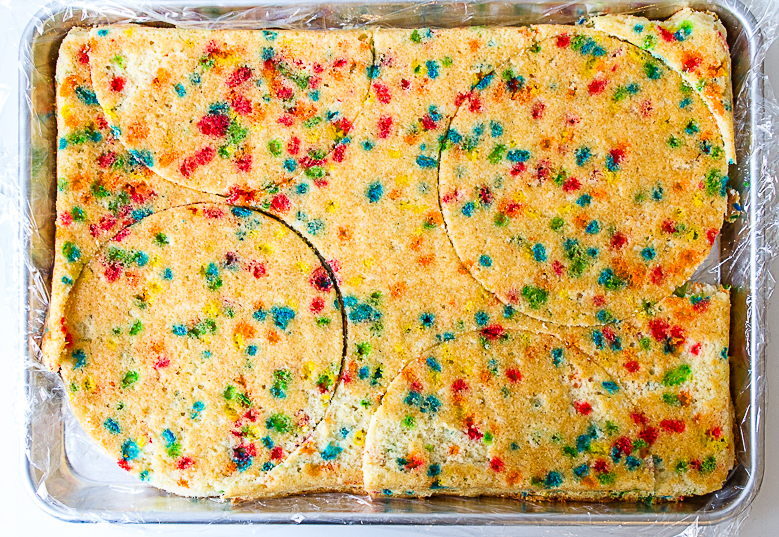
…melty sprinkles
Use the full circles for the top and bottom and use the two halves for the middle portion. Use the perfect circles for your top and bottom layer. Use the less perfect of the two rounds on the bottom. Before inserting the cake round into the bottom of the 6″ cake ring, line the ring with the specially purchased acetate so the acetate strip comes up above the ring. I used scotch tape (professional?) to hold the acetate together. Make sure your cake ring is clean and dry or else the cake will freeze and stick to it when you unmold the cake. (In other words, don’t cut out your cake circles, then forget to wash and dry the ring before beginning the molding process!) Gently push your first round into the mold lined with acetate. Drizzle 1/3 of the milk soak over top of the cake (I used a small ladle to do this). Spread icing over the top of the first layer of cake. Next place the cake crumbs into the icing, and press them down with the back of your hand, and then again, cover the crumbs with MORE icing. The second layer is pretty much the same, except you’ll have to add more acetate (tuck it between the ring mold and the previously placed acetate) then piece your two halves together.
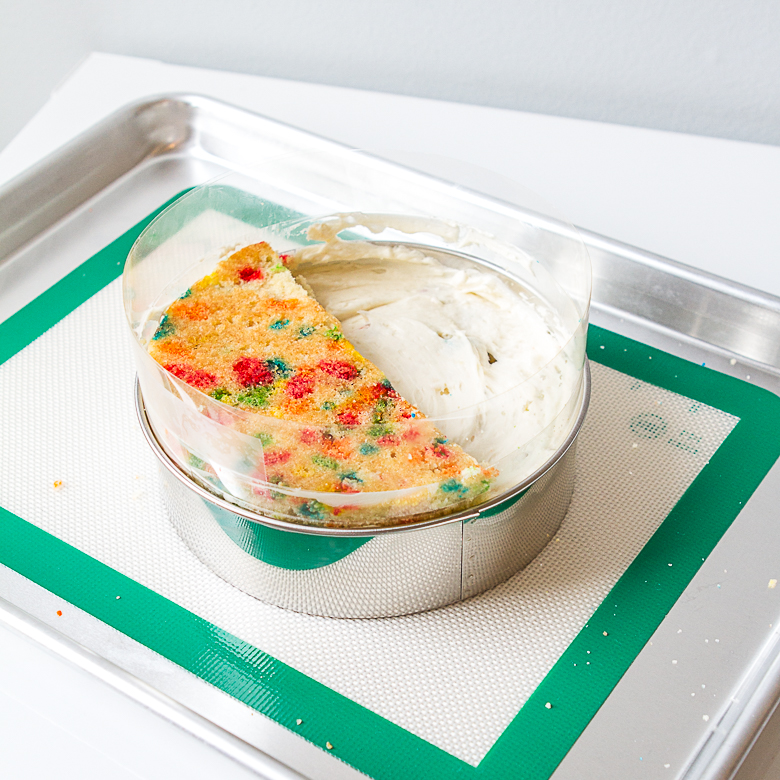
half one
So, fit the halves in carefully, then milk wash, then frosting…

Then add cake crumbs.
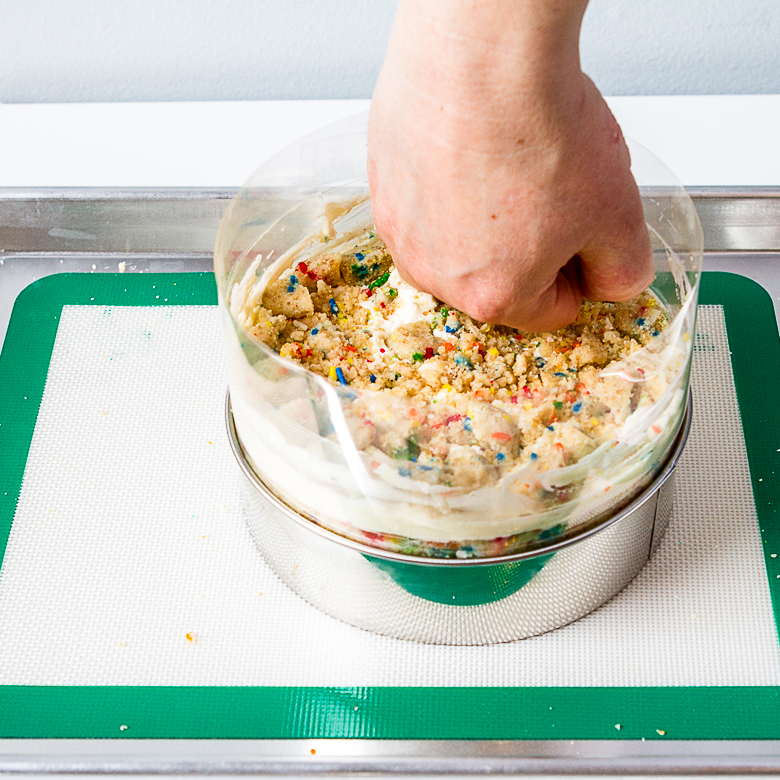
Lastly, add more frosting over top of the cake crumbs. Add more acetate before adding the prettiest layer on top. Use the last of the milk soak on top of the cake before adding the final frost, then crumb garnish. The remaining cake crumbs will garnish the top of the cake.

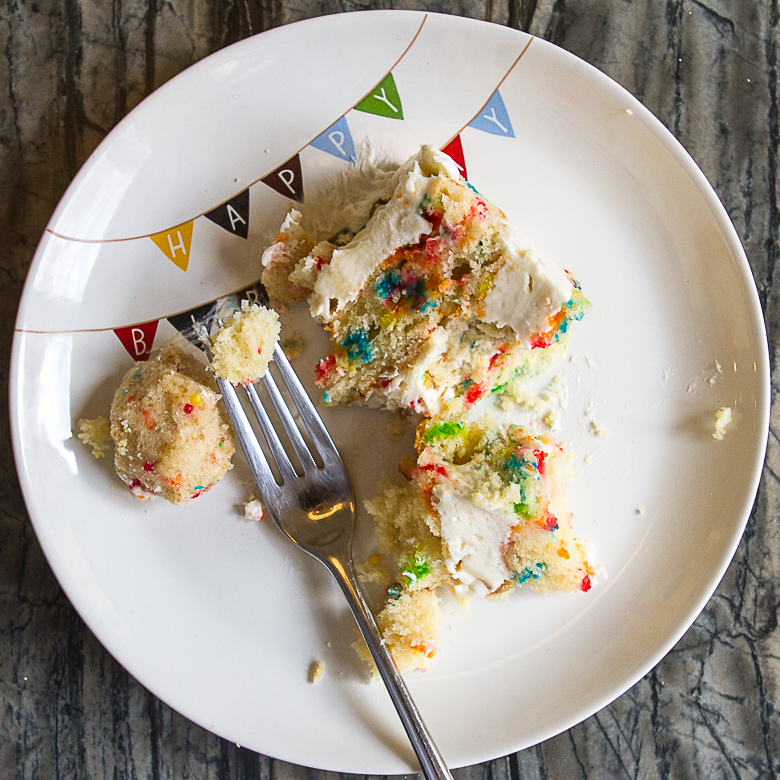
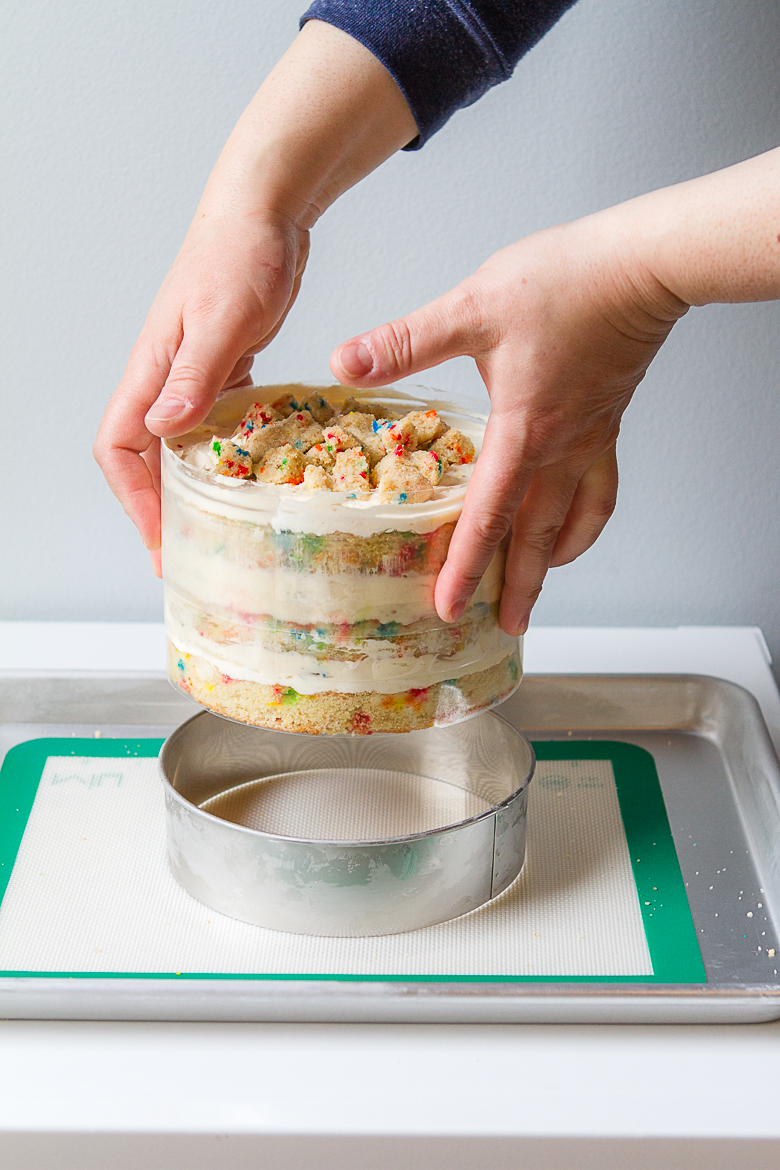
I wish I had placed the cake crumbs around the edge of the cake, rather than in the center, as I think it would have been easier to cut. Freeze the cake for 12 hours, then unmold immediately after taking out of the freezer. My mold came off easily, I think because it was lined with the acetate.
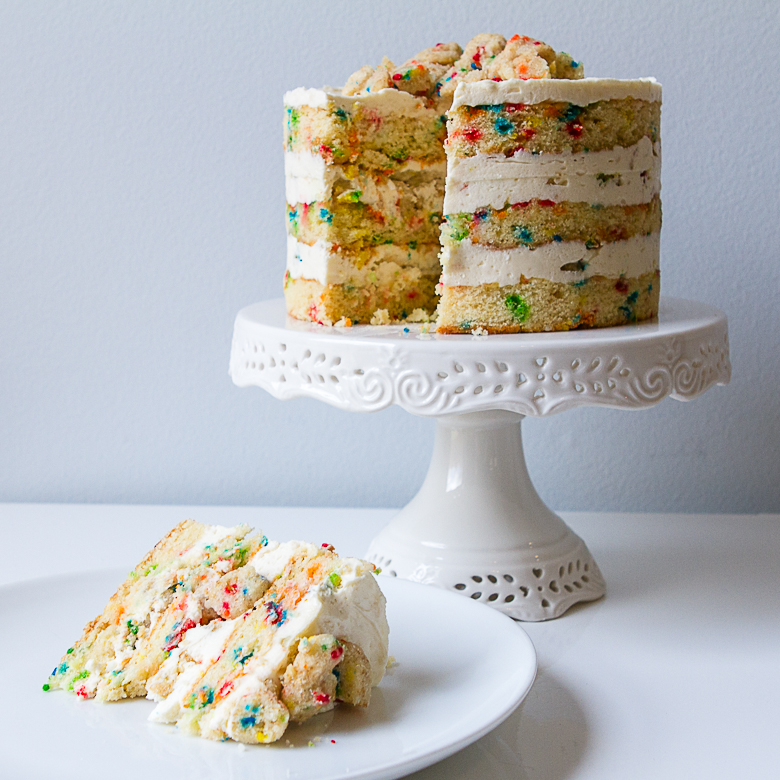
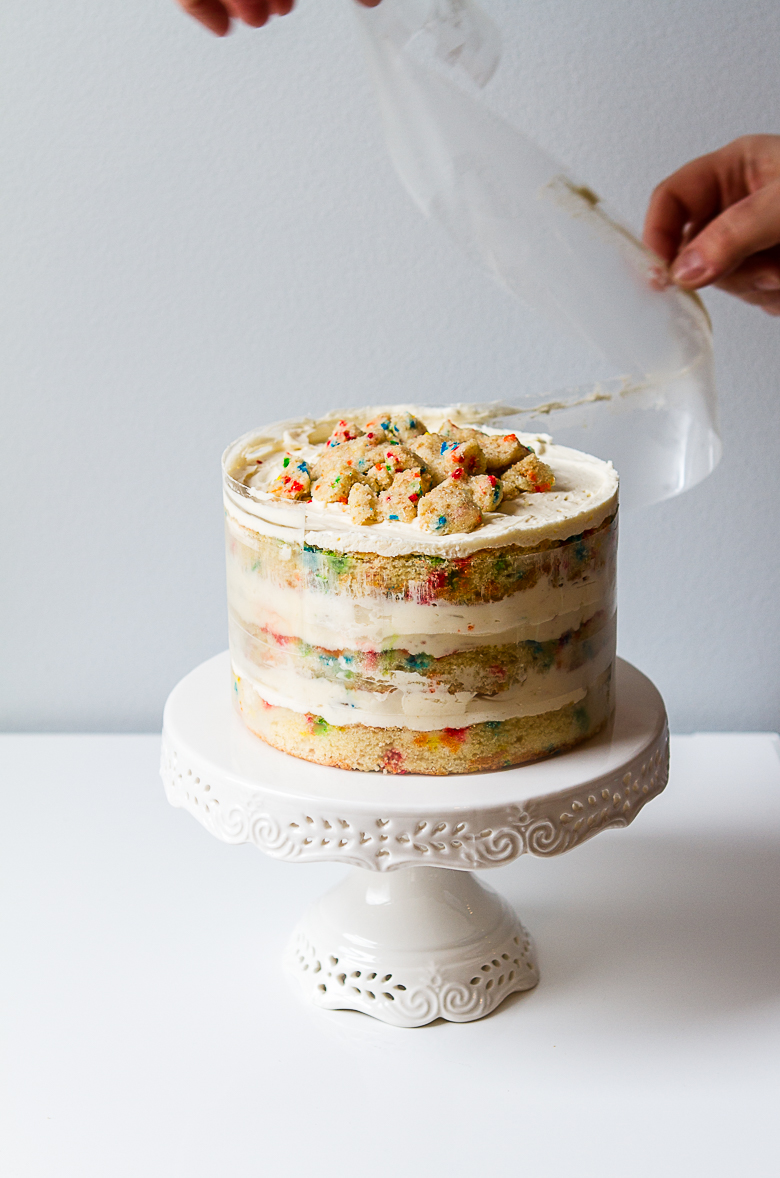
voila!
Gently peel away the acetate and allow cake to thaw in fridge for 3 hours before eating.
a work of art!
So there you have it, we made it through! Poor P got super tired hearing about this cake after day 3. He could hardly believe it when the day had finally come to eat it!!!
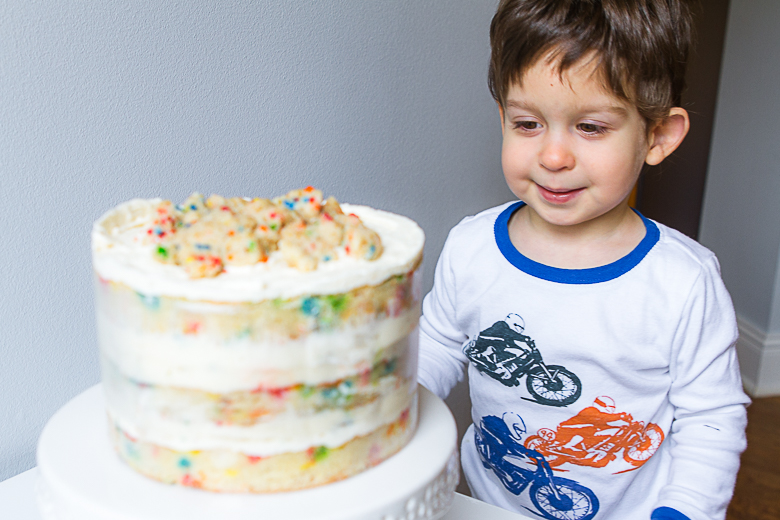
NOW, MUMMA???
If you are still with me and reading this and are like, girl, you are crazy, this cake has way too many steps and hours involved with it. Well, there’s no shame in purchasing it on-line directly from the NYC store! I mean, that’s what Taylor Swift and Jay-Z did, right? Happy Final Few Days of February, everyone!
Milk Bar’s Birthday Cake (A Christina Tosi recipe)
Prep time: 4+ hours
Set time: 12 hours (overnight)
Thaw time: 3 hours
Serves: 10-12
Birthday Cake Crumbs:
Ingredients:
- 1/2 cup granulated sugar (100 g)
- 1 1/2 tablespoons, packed light brown sugar (25 g)
- 3/4 cup cake flour (90 g)
- 1/2 teaspoon baking powder (2 g)
- 1/2 teaspoon kosher salt (2 g)
- 2 tablespoons rainbow sprinkles (20 g)
- 1/4 cup grapeseed oil (40 g)
- 1 tablespoon clear vanilla extract (12 g)
Method:
- Preheat heat the oven to 300°F.
- Combine the sugars, flour, baking powder, salt, and sprinkles in the bowl of a stand mixer fitted with the paddle attachment. Mix on low speed until well combined.
- Add the oil and vanilla at the same time and mix again on low. The wet ingredients will act as glue to help the dry ingredients form small clusters; continue mixing until that happens. If it doesn’t happen, you can always roll out balls with your hands.
- Line a sheet pan with parchment and bake crumbs for 15 minutes at 300°F.
- Let the crumbs cool completely before cake assembly. Stored in an airtight container, the crumbs will keep fresh for 1 week at room temperature or 1 month in the fridge or freezer.
Birthday Cake:
Ingredients:
- 4 tablespoons or 1/2 stick unsalted butter at room temp (55 g)
- 1/3 cup vegetable shortening (60 g)
- 1 1/4 cups granulated sugar (250 g)
- 3 tablespoons packed light brown sugar (50 g )
- 3 eggs
- 1/2 cup buttermilk (110 g)
- 1/3 cup grapeseed oil (65 g)
- 2 teaspoons clear vanilla extract (8 g)
- 2 cups cake flour (245 g)
- 1 1/2 teaspoons baking powder (6 g)
- 3/4 teaspoon kosher salt (3 g)
- 1/4 cup rainbow sprinkles (50 g)
plus - 2 tablespoons rainbow sprinkles (25 g )
Method:
1. heat the oven to 350°F.
2. Combine the butter, shortening, and sugars in the bowl of a stand mixer. Using the paddle attachment, cream together on medium-high for 2 to 3 minutes. Scrape down the sides of the bowl, turn mixer on low speed and add the eggs one at a time. Once the last egg is added, mix on medium-high for 2 to 3 minutes then scrape down the sides of the bowl.
3. With the mixer on low, stream in the buttermilk, grapeseed oil and vanilla. Increase the mixer speed to medium high (7) and beat for 6-12 minutes, until the mixture is practically white and twice the size of your original fluffy butter-and-sugar mixture. Look for a batter that is completely homogenous and don’t rush the process. Once finished, there should be no streaks of fat or liquid. Once finished, scrape down the sides of the bowl.
4. On low speed, add the cake flour, baking powder, salt, and the 50 g (¼ cup) rainbow sprinkles. mix for 45 to 60 seconds, just until your batter comes together. Give a final scrape down on the sides of the bowl.
5. Spray a the 10×15″ jellyroll pan with non-stick spray, then line it with parchment. Pour in the batter and using a spatula, spread the batter in an even layer in the pan. Tap the pan on the countertop to release air bubbles and even out the batter. Sprinkle the remaining 2 tablespoons of rainbow sprinkles evenly on top of the batter.
6. Bake the cake in a preheated 350°F oven for 30 to 35 minutes. The cake will rise and puff, doubling in size, but will remain slightly buttery and dense. At 30 minutes, gently poke the edge of the cake with your finger: the cake should bounce back slightly. The center should no longer be jiggly. Leave the cake in the oven for an extra 3 to 5 minutes if it doesn’t pass these tests.
7. Take the cake out of the oven and cool on a wire rack. The cooled cake can be stored in the fridge, wrapped in plastic wrap, for up to 5 days.
Birthday Cake Frosting:
Ingredients:
- 1 1/2 sticks of unsalted butter (12 tablespoons or 175 g)
- 1/4 + 1/8 cup vegetable shortening (75 g)
- 3 ounces cream cheese (85 g)
- 1 1/2 tablespoons glucose (40 g)
- 1 1/2 tablespoons corn syrup (27 g)
- 1 1/2 tablespoons clear vanilla extract (18g)
- 1 3/4 + 1/8 cups confectioners’ sugar, sifted (300 g)
- 3/4 teaspoon kosher salt (3 g)
- pinch of baking powder
- small squeeze of lemon juice
Method:
1. Combine the butter, shortening, and cream cheese in the bowl of a stand mixer fitted with the paddle attachment and cream together on medium-high for 2 to 3 minutes. Mix until the mixture is smooth and fluffy then scrape down the sides of the bowl.
2. With the mixer on its lowest speed, add the glucose, corn syrup, and vanilla. Turn the mixer up to medium-high and beat for 2 to 3 minutes, until the mixture is silky smooth and a glossy white. Scrape down the sides of the bowl.
3. Add the confectioners’ sugar, salt, baking powder, and lemon juice and mix on low speed just to incorporate them into the batter. Turn the speed back up to medium-high and beat for 2 to 3 minutes, until you have a stark white, super smooth frosting. Use the frosting immediately, or store it in an airtight container in the fridge for up to 1 week.
Birthday Cake Soak:
Ingredients:
- 1/4 cup milk (55 g)
- 1 teaspoon clear vanilla extract (4 g)
Whisk together the milk and vanilla in a small bowl.
Assembly:
1. Once all the above items are made, place a piece of parchment or a silpat on the counter and invert the sheet cake onto it. Peel off the parchment paper from the bottom of the cake. Use the 6″ cake ring to stamp out two circles from the cake. These are your top and bottom cake layers. Cut two additional circle halves out of the remaining scrap and save for the middle piece of the cake.
2. Clean and dry a 6″ cake ring. Place it in the center of a sheet pan lined with clean parchment paper. Tuck one strip of acetate inside of the cake ring. Secure with Scotch tape (on the outside of the acetate).
3. Press the first full cake round inside the ring. Ladle 1/3 of the birthday cake soak over the cake layer.
5. Use an offset spatula to spread one-fifth of the frosting in an even layer over the cake.
6. Sprinkle one-third of the birthday crumbs evenly over the frosting, using the back of your hand to anchor them in place.
7. Use an offset spatula to spread a second fifth of the birthday cake frosting as evenly as possible over the crumbs.
8. Using your index finger, tuck the second strip of acetate between the cake ring and the top ¼ inch of the first strip of acetate. Place the two cake halves on top of the frosting, and repeat the process from the first layer.
9. Add the final piece of acetate around the outside of the second strip’s piece. Please the prettiest cake round into the frosting. Cover the top of the cake with the remaining frosting then garnish the frosting with the remaining birthday crumbs around the edges.
10. Transfer the cake (still on the sheet pan) to the freezer and freeze for a minimum of 12 hours to set the cake and filling. the cake will keep in the freezer for up to 2 weeks
11. Remove cake from freezer at least 3 hours before you are ready to serve the cake. Since the cake is still frozen, it will be easy to transfer it to a plate or cake stand at this point. Using your fingers and thumbs, pop the cake out of the cake ring and peel off the acetate. Let the cake defrost in the fridge for a minimum of 3 hours (wrapped well in plastic, the cake can be refrigerated for up to 5 days).
12. slice the cake into wedges and serve.
Helpful References:
livforcake: http://livforcake.com/2015/05/momofuku-birthday-cake.html
Milk Bar Store: http://milkbarstore.com/main/menu/recipes-and-how-tos/
Bon Appetit: http://www.bonappetit.com/recipe/momofuku-milk-bars-birthday-layer-cake
Video: https://youtu.be/8EuESxt1gPE
How to build a Nuclear device may just be easier. Anyway, good on you for sticking with it and the end result looks amazing!!
I think you may be correct, Mr. Day! Happy B-day month to you, too! 🎂
Pingback: Strawberry Chiffon Cake - m's belly